

The private-label product development process has seven practical stages: define the brief, choose the development route, build the specification, develop and approve samples, confirm the commercial order basis, control production, and release finished goods using agreed quality and shipment evidence. The stages may overlap, but every stage should end with a named decision, owner, and record.
That last point is what keeps a project moving. A sample on a desk, a price in a message, and artwork marked "final" can all look like progress. None is reliable until everyone knows exactly what it approves and what remains open.
The Seven Steps at a Glance
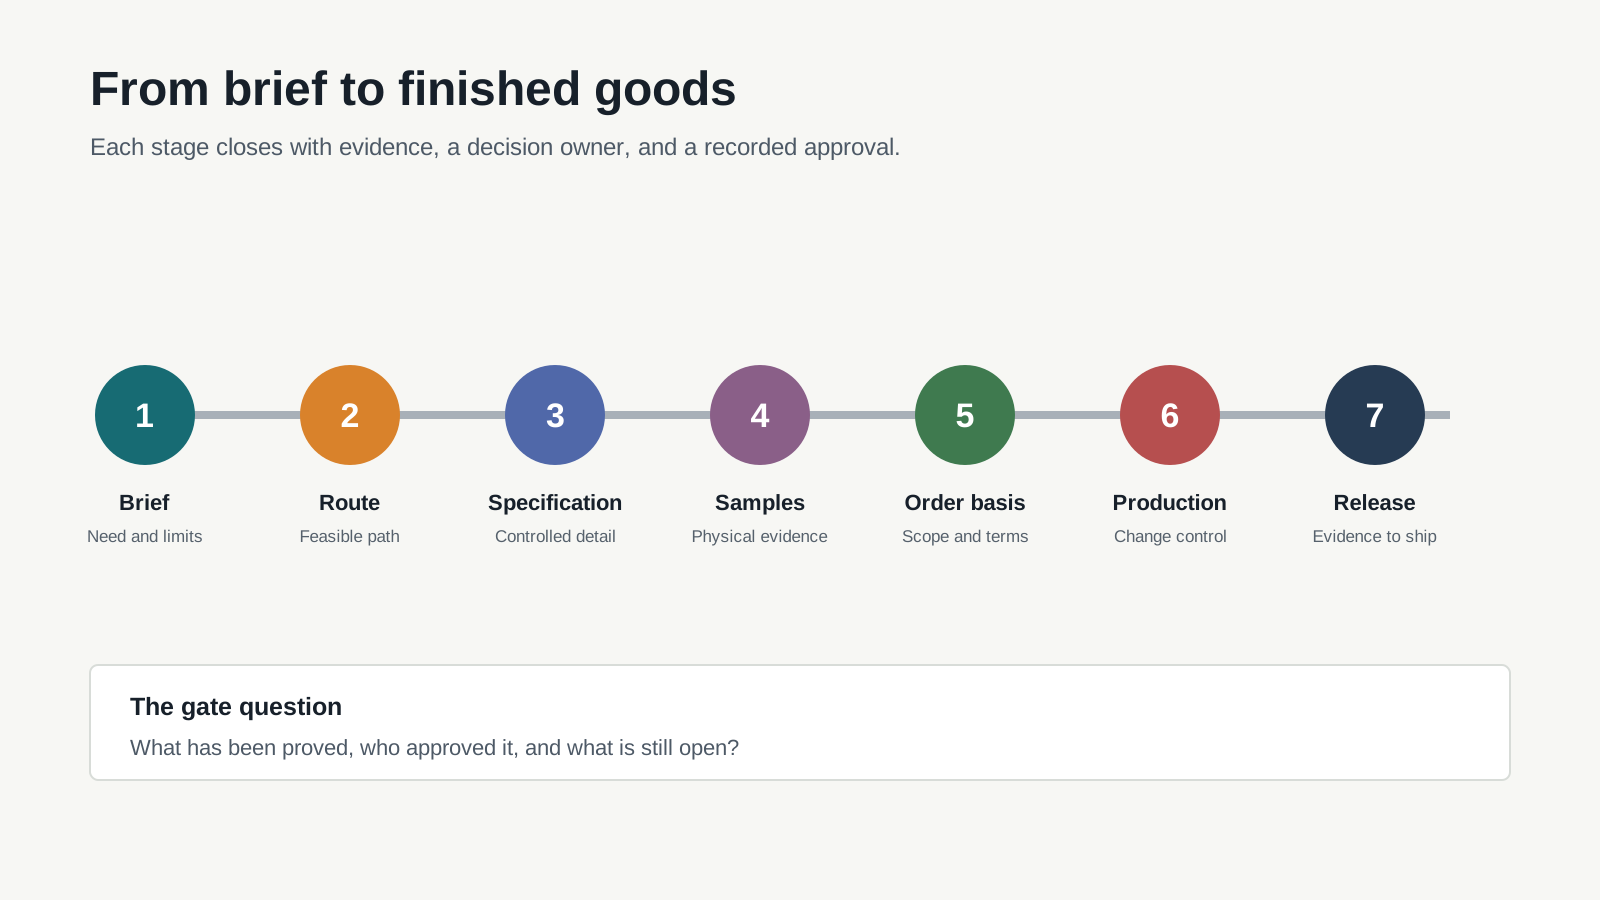
| Step | Main question | Evidence needed to move forward |
|---|---|---|
| 1. Define the brief | What are we trying to develop, for whom, and under what constraints? | Approved project brief and open-question list |
| 2. Select the route | Are we adapting an existing product or developing something more extensively? | Chosen route, feasibility findings, and stated assumptions |
| 3. Build the specification | What exactly must the product and packaging become? | Controlled working specification |
| 4. Develop samples | What has the physical evidence confirmed? | Revision-specific sample feedback and approval |
| 5. Confirm the order basis | What scope, quantity, terms, and responsibilities are agreed? | Aligned quotation, approvals, and order documents |
| 6. Control production | Is the current approved information being executed? | Production reference set and change log |
| 7. Release and ship | Do finished goods meet the agreed release conditions? | Inspection, test, document, and shipment evidence as applicable |
This is a decision framework, not a universal factory schedule. The exact sequence changes with the category, degree of customization, destination market, testing needs, packaging, and supplier arrangement.
Step 1: Turn the Product Idea Into a Working Brief
A development brief should describe the commercial problem before it prescribes every technical answer. At minimum, it should identify:
- target customer and use case;
- product category, format, and intended sales channel;
- destination market;
- expected quantity range and variant structure;
- required versus preferred customization;
- packaging direction;
- target launch date and budget context;
- reference products, images, artwork, or brand standards;
- claims, testing, documentation, or labeling questions;
- people authorized to approve the project.
Mark every input as fixed, preferred, or open. A fixed requirement may rule out certain routes. A preference can be traded against cost, quantity, or timing. An open point needs investigation. Mixing the three makes suppliers guess which compromises are acceptable.
For a field-by-field brief, use Arovi's private-label quote request checklist.
Gate 1: Is there enough information to assess a real product route without pretending that unanswered questions are already settled?
Step 2: Choose the Development Route
The first feasible option is not automatically the best option. Buyers may be comparing an existing product with branding changes, an adapted platform, or a more extensive product and packaging development path.
Assess each route against the same questions:
- Which product elements already exist?
- Which elements need modification, new tooling, or new development?
- What quantity or component constraints control feasibility?
- Which samples and tests will be needed?
- What information is confirmed, and what is still an assumption?
- Which trade-offs affect brand differentiation, risk, cost, or launch timing?
The Design Council's Double Diamond separates defining the right problem from developing and testing possible solutions. That distinction matters in sourcing: selecting a product too early can turn an untested assumption into the project foundation.
If the labels OEM, ODM, white label, and private label are still unclear, compare them in Arovi's manufacturing-model guide. The label describes a broad route; the written scope must still state what is being developed and who is responsible for each decision.
Gate 2: Which route best fits the brief, and what must be proven before it is treated as feasible?
Step 3: Build a Controlled Product Specification
A brief states intent. A specification turns that intent into reviewable product and packaging requirements.
Depending on the project, the specification may cover:
- dimensions, capacity, weight, materials, formula identity, or component references;
- color, fragrance, texture, finish, and acceptable variation;
- decoration, label, print, and artwork versions;
- primary packaging, retail packaging, pack-out, and shipping marks;
- SKU structure and quantity by variant;
- performance, inspection, testing, and documentation requirements;
- approved references, measurement methods, and tolerances;
- unresolved decisions and their owners.
Do not wait for the document to become perfect before using it. Give it a version number and update it as evidence improves. The important rule is that one current version controls the project.
Gate 3: Can a reviewer tell what is required, how it will be checked, and which points remain provisional?
Step 4: Develop and Approve Samples by Purpose
NIST describes product development as moving through market validation, development, prototyping, testing, and launch support. In a private-label project, samples are the evidence-producing part of that cycle.
Not every sample answers the same question:
- A stock sample may demonstrate an existing product or component.
- An appearance sample may confirm size, color, decoration, or presentation.
- A packaging mockup may test structure, fit, artwork, or unboxing.
- A functional or performance sample may test an agreed use condition.
- A pre-production sample may represent the intended production specification more closely.
Label the sample type, revision, date, and purpose. Record approval against criteria, not only with the word "approved." A beautiful packaging mockup does not prove transit protection. A fragrance approval does not approve a label. A sample made from provisional materials cannot silently become the final production standard.
Gate 4: What did this sample prove, what did it not prove, and which revision is the approved reference?
Step 5: Align the Quotation, Order, and Responsibilities
A quotation becomes useful only when it matches the current specification and assumptions. Before confirming the order basis, reconcile:
- product and packaging scope;
- quantity and split by SKU;
- included and excluded items;
- sampling, tooling, inspection, testing, and documentation scope;
- artwork and approval responsibilities;
- commercial terms and payment milestones;
- delivery term, place, and responsibility;
- unresolved assumptions and change rules.
Incoterms rules allocate particular delivery responsibilities, costs, and risks between buyer and seller; they do not replace a complete product specification or answer every transport question. Write the named place and agreed rule clearly, and confirm who handles the remaining shipment tasks.
Gate 5: Do the specification, quotation, order documents, and approval authority describe the same project?
Step 6: Control Production Information and Changes
Production should work from a released reference set, which may include the current specification, approved sample, artwork files, packaging instructions, quantity breakdown, and agreed quality criteria.
The largest risk is often not the original plan but a late change that reaches only part of the team. Treat a proposed change as a small decision package:
- What is changing?
- Why is it changing?
- Which product, packaging, SKU, artwork, test, cost, or date may be affected?
- Who assessed the impact?
- Who approved it?
- Which document and revision now control production?
GS1's GTIN rules show why packaging and product changes can have consequences beyond appearance: certain changes to dimensions, weight, quantity, or consumer information can require identifier decisions. Market and channel requirements should therefore be checked before a packaging change is released.
Gate 6: Is production using one current, approved reference set, with every material change recorded?
Step 7: Release Finished Goods and Coordinate Shipment
Finished-goods release should combine the evidence required by the project. Depending on the product and market, this may include:
- confirmation against the approved specification and sample;
- quantity and SKU reconciliation;
- visual, dimensional, functional, or packaging inspection results;
- required test or document status;
- defect disposition and corrective-action approval;
- carton, mark, and pack-out confirmation;
- shipping documents and delivery responsibilities;
- release authority.
Final inspection cannot repair an unclear specification or replace tests that should have happened earlier. It answers whether sampled finished goods and packing meet defined criteria at that point in time.
Gate 7: Is there enough agreed evidence to release the goods, and is the shipment handoff clear?
Use an Approval Ledger, Not a Trail of Messages
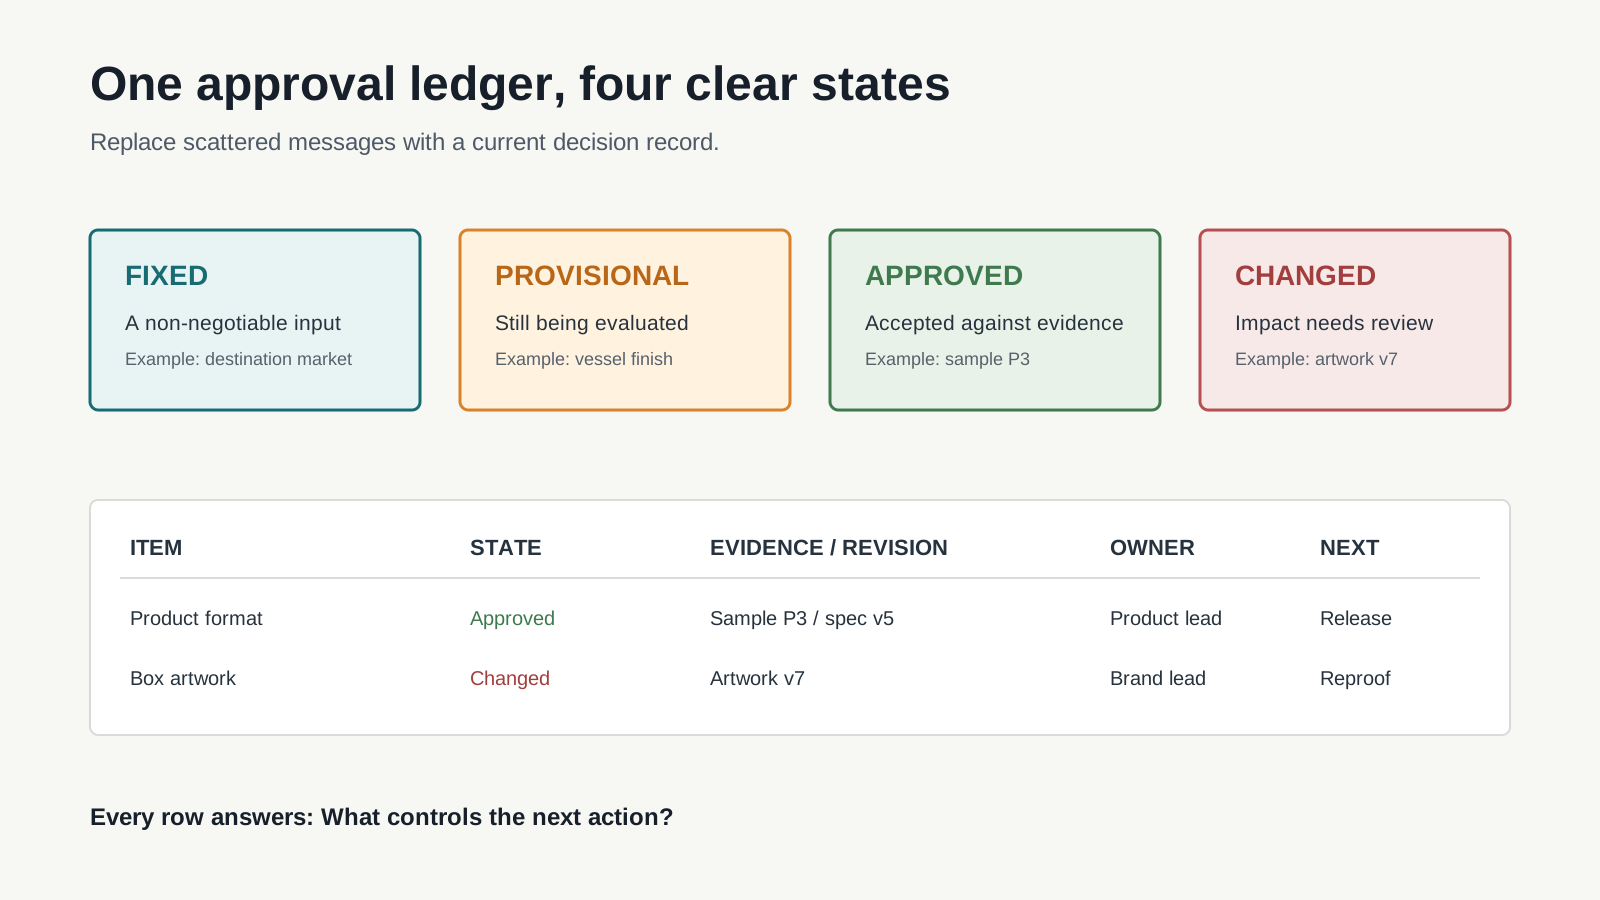
Maintain one short ledger throughout the project:
| Item | Current state | Evidence or revision | Decision owner | Next action |
|---|---|---|---|---|
| Product format | Approved | Sample P3 and specification v5 | Product lead | Release for production |
| Retail box artwork | Changed | Artwork v7 | Brand lead | Reconfirm print proof |
| Shipping mark | Provisional | Draft mark v2 | Logistics owner | Confirm before carton print |
Use only four states: fixed, provisional, approved, and changed. The ledger makes a common failure visible: one team thinks an item is final while another still treats it as a suggestion.
Which Steps Can Overlap?
Packaging design can begin while product samples are reviewed. Shipping planning can begin before finished dimensions are available. Artwork can progress while a component is being selected.
Overlap is sensible only when the dependency is named. Before starting work early, ask:
- What approved input does this task need?
- Which input is still provisional?
- What must be redone if that input changes?
- Who accepts that rework risk?
Parallel work is not automatically faster. It is faster when the cost of a change is understood and contained.
How Long Does Private-Label Product Development Take?
There is no reliable universal timeline. Development time changes with product category, number of variants, existing versus new components, formula or fragrance work, molds or tooling, packaging complexity, test requirements, sample revisions, buyer approval speed, supplier schedules, season, and shipping route.
A useful schedule shows dependencies and decision dates. Instead of asking only, "When will the product be finished?" ask:
- Which stage are we in?
- What evidence is due next?
- Who must approve it?
- Which later activities depend on that approval?
- What would trigger a new sample, quotation, test, or date?
Prepare the Project for a Productive First Review
The private-label process is not a straight conveyor belt. It is a sequence of narrowing decisions. The brief defines the problem; samples generate evidence; approvals control what enters production; release evidence controls what ships.
Review how Arovi Group works and then start a project with your product category, market, quantity range, customization priorities, packaging direction, target date, and available references. Feasibility, MOQ, pricing, samples, testing, documentation, production, and shipping remain project-specific.
Sources
- Design Council: The Double Diamond, accessed July 22, 2026.
- National Institute of Standards and Technology: Product Design and Development, accessed July 22, 2026.
- GS1: GTIN Management Standard, accessed July 22, 2026.
- International Chamber of Commerce: Incoterms Rules and Commercial Contracts, accessed July 22, 2026.